Inas Craft
Magazine

Subscribe Now

30% OFF for upcoming pattern for subscriber!

* indicates required

Saturday, April 6, 2024

Peace Garden Cushion Crochet Along

Peace Garden Cushion Crochet Along

Hi everyone! 

 After a long break from organizing a crochet along, I've finally decided to publish one of my favorite patterns as our next crochet along project. I've been holding back on publishing it because I wanted to perfect it, but the reality is that the time I have is just not enough, especially for creating video tutorials. So now, I'm learning to let go of perfectionism because waiting for perfection means I end up not making anything and not learning by doing. 

So, for those of you who have been longing for a crochet along with Inas Craft, 

 WELCOME TO 
THE PEACE GARDEN CUSHION CAL!! 


 OH, I'M SO EXCITED! 😍 

 Here's a little information about our crochet along (you can scroll down to see more).


Why I should join? 

- Enhance your crochet skills, whether you're a adventurous beginner or an experienced crocheter 
- Crochet along helps to keep you accountable and motivated to progress with your project 
- Feel the excitement of personalizing your creations with your preferred colors, types of yarn, and embellishments, enabling you to craft unique interpretations of the design. 

 Information about the pattern 
- US Terms 
- Skill Level : Advanced 
- Written pattern + photo for each round. 
- 22 rounds for front, 20 rounds for back 
- Made with lots of textured stitches (Front post stitch, Popcorn stitch, Cluster, picot) 

 LET'S JOIN THE JOURNEY 

 For you who join now 

 30+% OFF for subscribers (WITH COUPON CODE) 
$3.4 

 Non subscribers 
$4 

 During the CAL (14th April 2024) 
$4.4 

 After CAL (2nd May 2024) 
$4.9 

👇👇👇 SUBSCRIBE NOW 👇👇👇 
Buy for $4.9 $3.4 only!

30% OFF for upcoming pattern for subscriber!

* indicates required

Intuit Mailchimp


Although this will be a paid pattern for this Crochet Along, you still have a chance to get it for FREE ❤️ How?

Let’s see if you are really a BEST FRIEND of Inas! 💖 

1. Follow me on instagram @inas.craft OR facebook fanpage. 
2. Share my post (instagram/ fanpage) (instagram post, share in story / fanpage post, just share it) 
3. If you’ve finished 8 (or more) projects using Inas’ patterns (not flower please, only big project, it can be mandalas, doilies, big square patterns), share it on instagram/ facebook by take a photo of them in 1 frame, or make 3 photo of them in one grid. May be you’ve made 8 differents projects OR made 8 projects using 1 same pattern (may be you have made 8 daisily doilies) it’s okay too! 
4. Tag me in your post 
5. Also write that you ready for the next #PeaceGardenCushion CAL (use #PeaceGardenCushion hashtag) 
6. Tag your 3 friends to join this CAL in your post too. 
7. If you have done all those step, please kindly send me a message with your ravelry name/ email. Example of the post you can make: 


oh NO I’m not picking!! If you do all those step, I’ll give the pattern to you, ALL OF YOU FOR FREE!!! ❤️❤️❤️ so make sure you do step 7 so you can get the pattern for free. 

 **I may get LOTs of message because of this so if you have done those step and I haven’t send you the link, please don’t hesitate to send me a message again, please** 


What exactly is a CAL? Crochet Along (CAL) is when we crochet a project together in same time. 

When does the mini-CAL start? It will start in 14th April, 2024. 
Part 1: 14 April 2024 
Front: Round 1-4 
Back: Round 1-4 

Part 2: 15 April 2024 
Front: Round 5-8 
Back: Round 5-8 

Part 3: 18 April 2024 
Front: Round 9-13 
Back: Round 9-12 

Part 4: 21 April 2024 
Front: Round 14-16 
Back: Round 13-15 

Part 5: 26 April 2024 
Front: Round 17-19 
Back: Round 16-17 

Part 6: 1 may 2024 
Front: Round 20-22 
Back: Round 18-20 

How to get the pattern: When the pattern is updated, you will be notified via Ravelry inbox and email. You have to update it then you can download the next part. You can read my blog post how todownload an updated pattern (click here). 

If you still have a problem updating it, please contact me via instagram or email me at inasbasymeleh@yahoo.com 

What yarn/colors should I use? I used DK yarn (Paintbox DK yarn) and 4 mm hook. you can use any DK yarn and try to make first 4 rounds of back side to check the gauge. Click here to getinspiration. Feel free to use any colors with this design. 

Share your project with us 
- Instagram - don't forget to use hashtag #PeaceGardenCushion so we can meet there and feel free to tag me @inas.craft 
- International Group - Join Inas Craftand Friends on facebook and share your makes with us there.


QUESTIONS YOU MAY ASK

  • What is a crochet along (CAL)? A crochet along is an online event where participants crochet a specific project together within a set timeframe.
  • When does the CAL start? The CAL will commence on April 14, 2024, and the final part will be published on May 1, 2024.
  • Where can I get the pattern? You can purchase the pattern on Ravelry. The pattern will be released in parts on specific days.
  • Should I make a Cushion in this CAL? No, you can make it as a mandala only (just crochet the front part), no need to make a cushion
  • Can I sell my finished project? Yes, you can sell your finished project with or without crediting me as the designer. However, selling the pattern itself is not permitted.
  • Is it mandatory to finish the project during the CAL? No, it's not mandatory. The pattern will remain yours indefinitely, allowing you to finish it at your own pace. However, completing it alongside others adds to the excitement.
  • What if I have questions about the pattern? You can join our Facebook group "Inas Craft and Friends" to ask questions, or you can send me a direct message on Instagram at @inas.craft.
  • Is this project suitable for beginners? I'm sorry, it's not specifically designed for beginners. However, if you're an adventurous beginner, you're welcome to embark on this exciting journey. The pattern includes some special stitches such as Front Post stitches, Popcorn stitch, and picot, and requires mastery of changing yarn colors within a row.
  • How do I join the CAL? Simply purchase the pattern on Ravelry, and you'll receive each part of the pattern on specific days.
  • Do you have an Etsy? Unfortunately, I don't have one. I was permanently suspended, which is quite unfortunate. I apologize for any inconvenience. I hope someday.
  • Where should I share my progress? You can share your progress on Instagram using the hashtag #peacegardencushion and tagging me @inas.craft. Alternatively, you can share it in our Facebook group "Inas Craft and Friends" or on your personal Facebook account, tagging the "Inas Craft" fan page. Don't forget to also update your progress on Ravelry. ❤️
  • Is there any requirement to join the CAL? There aren't many requirements, you just need to purchase the pattern and you'll receive email updates on the pattern at specific intervals. In terms of skill level, you should be at an intermediate level since most of the patterns from Inas Craft involve some special stitches and overlay crochet. If you're an adventurous crocheter, you're also welcome to join the fun with us.
  • Is there a video tutorial for the pattern?Unfortunately, there isn't a video available at the moment. The pattern is written in US terms with photos for each round and charts. You can also seek assistance or share your concerns in the "Inas Craft and Friends" Facebook group.
  • Is there any reward for participants who complete the CAL? Typically, we provide online certificates for participants who successfully complete it. And hopefully, there will be surprise giveaways in the future.
  • What yarn and hook should I use? I used Paintbox DK yarn and a 4 mm hook. You can use any DK yarn and try to match the gauge to see if it aligns with the designer's recommendations. You're completely free to choose any yarn color you like.

Wednesday, August 30, 2023

How To Make Popcorn Stitch (Cara merajut tusuk Popcorn)

How To Make Popcorn Stitch (Cara merajut tusuk Popcorn)

Hi all!

Is this your first time using this stitch? You may will love the stitch because it make all design more textured because it popping out and that what make it named popcorn stitch.

So let’s start it!

Halo rajuters!!

Pertama kali nemuin tusuk popcorn? Coba deh pasti bakal suka dengan tusukan ini karena hasil rajutan akan lebih bertekstur dan makin cantik. Yuk langsung ambil benang dan jarumnya.


POPCORN STITCH

(Tusuk Popcorn)


Terminology used : 

US Term (Indonesian)

St: stitch (tusukan)

Sp: space (ruang/lubang dari membuat beberapa rantai)


How to (Cara membuat):


1. Make 5 dc in indicated st/sp 

1. Buat 5 dc di st/sp yang sudah ditentukan, lepaskan jarum


2. drop working loop, insert through from front to back of 1st dc,

2. Masukan jarum di dc pertama dari depan ke belakang, lalu kait lubang benang terakhir yang dilepas


3. pull working loop through, ch 1 to secure

3. Tarik lubang benang tersebut keluar melalui dc pertama.


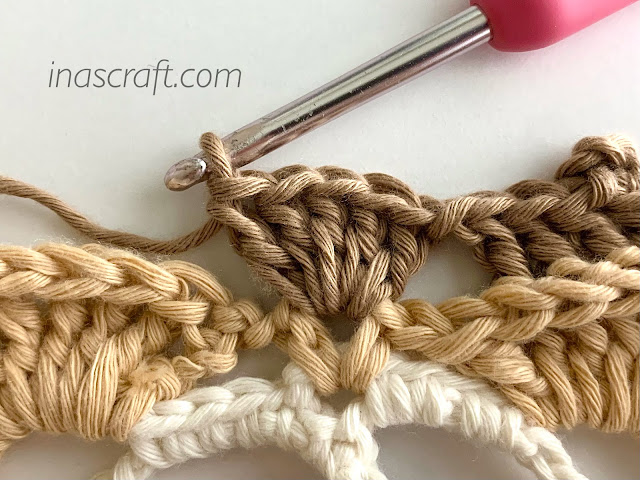
Some designer using ch-1 to close the popcorn st. You have to read the pattern information in the beginning of the pattern how to make some special stitches because each designer have different way. if written that you have to do ch-1, make 1 chain and this stitch is part of popcorn stitch and not written in the pattern.

if you have any question about it or other Inas Craft's pattern, don't hesitate to ask in our facebook group. Click to join.

Beberapa desainer pola menggunakan ch-1 untuk menutup tusuk popcorn. Bacalah informasi pola di awal sebelum merajut, biasanya tertulis cara membuat beberapa tusukan khusus karena setiap desainer memiliki cara yang berbeda. Jika tertulis harus membuat ch-1, buatlah 1 rantai dan setelah step ke-3 dan ch-1 ini merupakan bagian dari tusuk popcorn (tidak lagi tertulis di pola). Semoga bermanfaat!

kalau ada kendala, bisa bertanya di grup facebook kami. Klik untuk bergabung.


Tuesday, November 29, 2022

Tarsia Mandala mini Crochet Along [Part 3]

Tarsia Mandala mini Crochet Along [Part 3]

Jump link: 
Chart 
Portuguese

🌸 ATTENTION


COPYRIGHT

This pattern is FREE for all. If you want other people to join this mini CAL, please appreciate me by sharing the pattern's link (this blog), not by copy the pattern. Please do not copy, edit, rewrite, sell in part or whole pattern, and translate the pattern, it's illegal. You may sell your finished project but please don't use my pictures to promote. Thank you for your attention 🌹


Tarsia Mandala mini Crochet Along [Part 3]


Click here for CAL information 


Designed by Inas Fadil Basymeleh


Round 11: Join F in any ch-3 sp, ch 3, (dc, picot, 2 dc) in same sp, ch 2, sc in next 2 sts, ch 2, *(2 dc, picot, 2 dc) in next ch-3 sp, ch 2, sc in next 2 sts, ch 2; repeat from * around, join.

96 dc, 48 sc, 24 picot, 48 ch-2 sps.


Round 12: Ch 1, BPsc around same st, ch 2, skip (dc, picot, dc), BPsc around next st, ch 2 (place marker), skip (ch-2, 2 sc, ch-2), *BPsc around next st, ch 2, skip (dc, picot, dc) BPsc around next st, ch 2, skip (ch-2, 2 sc, ch-2); repeat from * around, join.

— 48 BPsc, 48 ch-2 sps.

Fasten off F.


Round 2: Join B with beg puff in any, ch 1, *puff in next, ch 1; repeat from * around, join.

—12 puff, 12 ch-1 sps.

Fasten off B.


Round 13: Join B in marked sp, ch 3, (2 dc, picot, 3 dc) in same sp, skip BPsc, sc in next ch-2 sp, skip BPsc, *(3 dc, picot, 3 dc) in next ch-2 sp, skip BPsc, sc in next ch-2 sp, skip BPsc; repeat from * around, join.

24 sc, 144 dc, 24 picot

Fasten off B.


Weave in ends, blocking is suggested.


Thank you so much for joining our crochet along. We hope we can meet you again in another CAL ❤️

Share your project with us 

Instagram - If you are on instagram, share your progress, use hashtag #TarsiaMandala, and don’t forget to tag us @inas.craftwe are happy to see yours too.

Ravelry - You can also add photos of your progress in Ravelry

 Facebook Group - there is a Facebook Group for help and support named “Inas Craft and Friends”. We are happy to see your progress with us there.

Telegram - Join Inas Craft channel on telegram and share your progress there to another members.


❤️CHART❤️
Created by Maryam Sarkaar

ROUND 11


ROUND 12


ROUND 13 

❤️SPANISH❤️

🌸 ATENCIÓN

Este patrón es GRATIS para todos. Si quiere que otras personas se unan a este mini CAL,agradecería que por favor comparta el enlace del patrón (este blog), no copiando el patrón. Por favor no copiar, editar ni vender en partes o el patrón completo. Puede vender su proyecto terminado pero no utilice mis imágenes para promocionarlo. Gracias por su atención 🌹


Tarsia Mandala mini Crochet Along [Parte 3]


Click aquí para la información del CAL


Diseñado por Inas Fadil Basymeleh

Traducido por Julia Pazols Veloso


Vuelta 11: Unir F en cualquier E de 3 cad, 3 cad, (v, picot, 2 v) en el mismo E, 2 cad, pb en los  siguientes 2 pts, 2 cad, *(2 v, picot, 2 v) en el siguiente E de 3 cad, 2 cad, pb en los siguientes 2 pts, 2 cad; repetir desde * alrededor, unir.

—96 v, 48 pb, 24 picot, 48 E de 2 cad.


Vuelta 12: 1 cad, pbTA alrededor del mismo pt, 2 cad, saltar (v, picot, v), pbTA alrededor del siguiente pt, 2 cad (poner un marcador), saltar (2 cad, 2 pb, 2 cad), *pbTA alrededor del siguiente pt, 2 cad, saltar (v, picot, v) pbTA alrededor del siguiente pt, 2 cad, saltar (2 cad, 2 pb, 2 cad); repetir desde * alrededor, unir.

— 48 pbTA, 48 E de 2 cad.

Cortar el hilo y rematar F.


Vuelta 13: Unir B en el espacio marcado, 3 cad, (2 v, picot, 3 v) en el mismo E, saltar pbTA, pb en el siguiente E de 2 cad, saltar pbTA, *(3 v, picot, 3 v) en el siguiente E de 2 cad, saltar pbTA, pb en el siguiente E de 2 cad, saltar pbTA; repetir desde * alrededor, unir.

—24 pb, 144 v, 24 picot

Cortar el hilo y rematar B.


Esconder todos los hilos y bloquear.


Gracias por unirte a nuestro crochet along. Esperamos verte nuevamente en otro CAL ❤️


Comparte tu proyecto con nosotros

Instagram – Si estás en Instagram comparte tu avance usando la etiqueta #TarsiaMandala, y no olvides etiquetarnos, @inas.craft y @Juli.colores, estamos felices de ver tu proyecto.

Ravelry – Puedes agregar fotos de tus avances en Ravelry

Grupo de Facebook – hay un grupo de Facebook para ayuda y apoyo llamado “Inas Craft and Friends”. Estamos felices de ver tus avances ahí.

Telegram – Únete al Canal de Inas Craft en Telegram y comparte tu avance ahí con otros miembros.


❤️JAPANESE❤️
Translated by Masako Kawahara (@crochet_hmmm)
 

Tarsia Mandala mini Crochet Along [パート 3]


Click here for CAL information


Designed by Inas Fadil Basymeleh

Translated by Masako Kawahara


11段目: Fで、鎖3目スペースに編み入れます。鎖3目、同じスペースに(長編み1目、ピコット、長編み2目)、鎖2目、次の2目に細編みを1目ずつ、鎖2目。*次の鎖3目スペースに(長編み2目、ピコット、長編み2目)、鎖2目、次の2目に細編みを1目ずつ、鎖2目; *以降を繰り返し、最初の目に引き抜きます。

長編み96目、細編み48目、鎖2目スペース48、ピコット24


12段目: 1目、同じ目に〈裏引き上げ編み〉細編み、鎖2目。(長編み1目、ピコット、長編み1目)は飛ばし、次の目に〈裏引き上げ編み〉細編み、鎖2目(マーカーをつける)。次の(鎖2目、細編み2目、鎖2目)を飛ばします。*次の目に〈裏引き上げ編み〉細編み、鎖2目。(長編み1目、ピコット、長編み1目)は飛ばし、次の目に〈裏引き上げ編み〉細編み、鎖2目。次の(鎖2目、細編み2目、鎖2目)を飛ばす; *以降を繰り返し、最初の目に引き抜きます。

〈裏引き上げ編み〉細編み48目、鎖2目スペース48

Fを切ります。


13段目: Bでマーカーをつけたスペースに編み入れます。鎖3目、同じスペースに(長編み2目、ピコット、長編み3目)、次の〈裏引き上げ編み〉細編みは飛ばし、次の鎖2目スペースに細編み1目、次の〈裏引き上げ編み〉細編みを飛ばします。*次の鎖2目スペースに(長編み3目、ピコット、長編み3目)、次の〈裏引き上げ編み〉細編みは飛ばし、次の鎖2目スペースに細編み1目、次の〈裏引き上げ編み〉細編みを飛ばす; *以降を繰り返し、最初の目に引き抜きます。

細編み24目、長編み144目、ピコット24

Bを切ります。


糸端のしまつをして、ブロッキングをしてください。


ご参加、ありがとうございました。次回もお会いできますように ❤️


みんなでシェアしましょう 

Instagram - ハッシュタグ #TarsiaMandala をつけて投稿。 @inas.craft @crochet_hmmm のタグ付もお願いします。

Ravelry - ラベリーにも写真を投稿できます(ラベリーのアカウントが必要)

Facebookグループ - Inas Craft and Friends” に参加して写真を投稿しましょう。

Telegram - テレグラムのアカウントは Inas Craft channel です。こちらでも投稿をシェアできます。


❤️Portuguese❤️


🌸 ATENÇÃO

Este padrão é gratuito para todos. Se você juntar outras pessoas a esta mini CAL, em consideração ao meu trabalho, por favor compartilhe o link do projeto (este blog) e não uma cópia. Por favor não copie, edite ou venda o padrão no todo ou em partes. Os trabalhos feitos a partir deste padrão poderão ser vendidos, porém por favor não usem minhas fotos para divulgá-los. 

Obrigada por sua consideração.    


Mandala Tarsia mini CAL [Parte 1]


Clique aqui para Informações da CAL


Projeto de Inas Fadil Basymeleh (@inas.craft)

Tradução de Izilda Garcez Capovilla (@tramma.rara)


Carreira 11: Junte a cor F em qualquer esp 3-c, 3 c, (pa, picot, 2 pa) no mesmo espaço, 2 c, pb nos próximos 2 pts, 2 c, *(2 pa, picot, 2 pa) no próximo esp 3-c,  2 c, pb nos próximos 2 pts, 2 c; repetir de * até o final, fechar..

—96 pa, 48 pb, 24 picot, 48 esp 2-c.


Carreira 12: 1 c, Tpb ao redor do mesmo pt, 2 c, pular (pa, picot, pa), Tpb ao redor do próx. pt, ch 2 (colocar marcador), pular (2 c, 2 sc, 2 c), *Tpb ao redor do próx. pt, 2 c, pular (pa, picot, pa) Tpb ao redor do próx. pt, 2 c, pular (2 c, 2 sc, 2 c); repetir de * até o final, fechar. Arrematar cor F

— 48 Tpb, 48 ch-2 sps.


Carreira 13: Juntar a cor B no espaço com o marcador, 3 c, (2 pa, picot, 3 pa) no mesmo espaço, pular Tpb, pb no próximo es 2-c, pular Tpb, *(3 pa, picot, 3 pa) no próximo esp 2-c, pular Tpb, sc no próximo ch-2 sp, pular Tpb; repetir de * até o final, fechar. Arrematar cor B.

—24 sc, 144 pa, 24 picot


Arremate as pontas. Sugerimos formatar.


Muito obrigada por juntar-se a nós nesta CAL. Esperamos encontrá-lo novamente numa próxima CAL ❤️


Compartilhe seu projeto conosco 

Instagram - compartilhe seu progresso com a hashtag #TarsiaMandala,  e não esqueça de marcar @inascraft e @tramma.rara. Ficaremos felizes de ver seu trabalho também! 

Ravelry - Você pode adicionar fotos do seu progresso em Ravelry

Facebook Group - há um Grupo Facebook  para ajuda e compartilhamento chamado “Inas Craft and Friends”. Ficaremos felizes em acompanhar seu progresso pelo grupo também.

Telegram - Junte-se a Inas Craft channel no Telegram e compartilhe seu progresso com os outros membros.